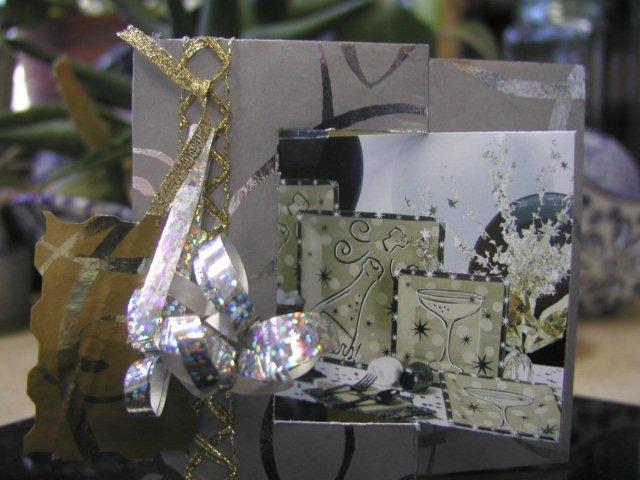
New Year's 2010

New Year's 2010

Saturday, March 13, 2010

Hello Chickie

Oh no, not another swap :-)  Yes indeed...this time an "easel card" swap for Cardmaking.  Since Easter is around the corner I chose a chick (with a twist) as my theme.  I was inspired by a card on Valita's Fresh Fold Patterns.  I made my own pattern and voila'!
I first cut an oval in the purple cardstock (to which I had already added one scalloped edge) and then embossed it with a QuicKutz embossing folder (retro diamonds).  Next I pieced together the wing sections and attached them to the sides by taping them on the backside.  The "chick or chick in an egg" was done with "iris folding".

After the iris folding was finished I cut the nose and feet freehand and glued them onto the chick and lastly I added the "wiggle eyes" and the "Happy Easter" sticker.
The purple has been attached to the card base with double sided tape.  On the inside I used a square yellow brad that is  holds the card up when it is open.  As you can see I also added some cute "chickie" stickers on the inside.
This picture shows the card at a side view.  To put in an envelope you just lift the standing section and lay it flat. 
 
The top photo has the shape of the cutouts and aperture.  The bottom photo is the "iris" pattern to use with the outline.  A PDF of the two can be found here.

Friday, March 12, 2010

Ribbon Circles

For this month's swap for my Cardmaking group I signed up to do a turquoise and brown card.  As I mentioned in my March 10 post, the turquoise and brown combination is very popular.
I got my inspiration from Traditional Card Techniques by Marie Browning. I used an "iris folding" pattern that incorporated five different sections.  For each of those sections I used a different turquoise, brown or combo of turquoise and brown ribbon.  Let me tell you...it wasn't easy finding five ribbons that went with each other!!!
Here is a close up of the iris.  I made it on a piece of brown cardstock.  On the turquoise card base I cut a larger circle and placed the brown underneath.  After adhering I attached another brown piece to the back of the iris on the inside of the card.

I finished the front by gluing down four brown strips to form a square shape.  On the inside I added a brown piece for the greeting.  I corner punched the piece and glued it down.
This is the book I mentioned...

Thursday, March 11, 2010

Vroom Vroom

Last year I made a great card for my sister's birthday (if I do say so myself :-).  She has and loves her Harley and I had a motorcycle pattern for paper embroidery that I stitched for her.
I attached the white cardstock that was stitched to a black card base.  I cut some striped paper to frame the top and bottom and add some pizazz to the design and finally added a Happy Birthday sticker.
The inside repeats the stripe, black and white theme and included this verse.

Wednesday, March 10, 2010

Ribbon Weaving

Here's a card inspired by so pretty ribbon I have.  The turquoise and brown combination is very popular nowadays and it is one I'm quite fond of.
I started with a piece of brown and on the back I drew a grid so that the ribbons would be spaced out evenly (a half inch apart and from the edges).  I cut slits on all four sides so that the ends of the ribbon would go to the back where they could be taped down.  I did one direction first and then on the second go around I wove the ribbons as I went as well as taping down the ends.

This piece of brown with the weaving was attached to the turquoise card base with double sided tape for strength.  I cut four thin strips of turquoise and added them around the brown.  Finally I added a turquoise and brown punched flowers to the center and on top of that a turquoise flower gem.
I took another brown square and corner punched it Paper Studio's ("coat of arms")and attached to the inside of the card.  The turquoise with the flower cutout was leftover when I punched the flower.  I decided to repeat the theme by using it on top of the brown.

Tuesday, March 9, 2010

Let's Deal

Here is another "lace' or incire" card I made for another friend's birthday. I stamped and colored the design on the front.  I used this stamp because it is one of her favorite sayings..."Put on your big girl panties and deal with it"!
This time I used the lace' method on the folded edge.  You can find a tutorial and pattern for this fold here.  This is really easy but looks difficult.

Monday, March 8, 2010

Thanks for the Memories

Two of my "bestest" buddies took me to lunch on my birthday last year.  We had a fantastic lunch at Napolitos and I even got a personal sized birthday cake!  I received presents and cards and comradery...my best birthday lunch ever!
I made a "Thank You" card for each made with the "Lace' Method" also known as "Incire" or "Lattice" or "Cut and Tuc" or "Cut andFfold".  I cut the white cardstock to the size I wanted and glued a piece of patterned paper to one side of it and let it dry under a pile of books.

Incire involves using a template or pattern, cutting along the lines and folding and tucking.  I wanted my folds to stand out more so that is why I added the patterned paper.  When you fold back the cut section the pattern shows in contrast to the white.

After the paper dried I used a template (American Traditional-"wide arrow") and cut as instructed on the package. Then one by one you fold the larger cut sections up and back and crease.  Finally, you tuck each large point  under each smaller point.  For a good visual go to this tutorial.
The first card was attached to a purple card base and the second to a white card base.  The flowers on each were purchased and I attached them with black brads.  The "thank you" on each is a sticker.

Sunday, March 7, 2010

Bzzzzzzzzzzzzzz

Here's another version of the pop-up card from earlier this week.
I used cardstock, a foam bee stamp and a flower punch on this example.  The daisy was a graphic that I printed out on the yellow cardstock.
 
Here's a side view that shows the "inner workings".
Here is what the card looks like when folded flat!

Saturday, March 6, 2010

Sunny Days

Here's a fun card to make.  The base is made of cardstock and the decoration and greeting are made on acetate which is attached with four eyelets.
The sun (Soleil Points by Stampendous) was stamped with a permanent black ink pad (StazOn) and then different colors of liquid ink were dropped and allowed to mingle and then dry. I used Adirondack Alcohol Inks by Tim Holtz.  The inked side faces the cardstock and is then attached.
 
The greeting was made with Microsoft Word and printed on acetate made for my printer.  This was also attached with four eyelets.
As you can see from this side view, there is an upside down "v" shape on the inside flap.  This is called a "mountain fold".  This flap has a quarter inch flap that glues to the back to close the card.  The card stands by itself and also folds flat to fit an envelope.
This diagram shows the measurements I used on an 11 inch piece of cardstock.  These measurements can be altered to suit your paper and the size you wish to make your card.  The lines need to be creased with a bone folder and folded as the picture shows.  I attached the quarter inch fold to the back with some double sided tape for strength.  For a larger version of the diagram go here.

Friday, March 5, 2010

Just a Note

I can't take credit for this one.  I found the instructions in a book by Sandi Genovese called Creative Greeting Cards.
 
I followed the card pretty much verbatim.  I scanned a piece of music for the patterned paper and cut out the letters for "Hi" using my Sizzix and alphabet dies.
I placed both letters on a black background so they wouldn't twirl around and hung the letters with thread and added a "Thinking of You" tag to the inside.


Thursday, March 4, 2010

Leaping Leprechauns

Here is a card I just made for my Iris Folders group exchange.  The theme is "It's not easy being green".  The obvious...Kermit the Frog...did not appeal to me since it is March, so I went with a shamrock.
 
Each leaf of the shamrock and the stem were done with "iris folding".  I used three different shades of green paper and finished the "iris" with scraps of the green cardstock that the leaves were set into.  I surrounded the outline of all the leaves with a green sticker.
 
On the inside I added an Irish Blessing.  The punch used was from EKSuccess (Argyle).

Wednesday, March 3, 2010

O'Shamrock

Just made an "Iris Folded" shamrock card for my sister.  Especially fitting since we are part Irish!
Instead of paper for the folding I used ribbon.  It looks great but it is more difficult to attach because it tends to warp and doesn't "stick" as good as paper.  However, I like the effect and thought it was worth the extra effort.  I surrounded the edge of the shamrock with a long green sticker.  This part of the card was then attached to the base card.
 
On the inside I added an Irish Blessing.  The border of the light green backing was edged with an EKSuccess edger punch (English Ivy).

Tuesday, March 2, 2010

Pop Goes the Leprechaun

Last March I did a swap with my Dutch Papercrafts card group.  We all used instructions from another Dawn video and since it was March I went with a St. Patrick's Day theme.
I made the card out of cardstock and punched the edges with a Fiskar's border punch (Border Rope).  Then I added stickers and 3D attachments.  Once the card is decorated it folds flat and easily fits in an envelope.
This is a second version of the pop up card.  I punched out the shamrocks using my Sizzix and I did the border punching with a Martha Stewart edge punch (Embossed Zig Zag).  The rest of the decorations are purchased 3D's.

Monday, March 1, 2010

Paddy me Boyo

This is a card I made for my sister last March.  It is called a "File in the Middle" card and there's a video by Dawn that gives instructions.
  
The matte on the front was made with a border punch by Paper Studio.  The decorations were 3D scrapbook attachments.
This view shows the inside when open.  There is a section in the middle that has a "porthole".  When folded one way it shows the lucky horseshoes and ther other way shows the shamrocks.
 
 
I punched out some more of the border and attached it to the inside.  I also cut out and attached the light green shamrocks and then wrote the sentiment.  Around the "portholes"  I attached circular frames made with two circular punches (inside cut by smaller circle).

Sunday, February 28, 2010

Window View

This was a fun card to make.  The butterfly on the circles is actually on the inside on the yellow spotted paper.  The scroll shape is a cut out window.  I used an emery board to "sand" the edges of the scroll window.  The other butterfly was cut out of the same yellow paper and attached to the front of the card.
For the final touches I added a ribbon and two green stripes.  The words were printed out on the same yellow paper and glued to the front.  I used three different scallops that I punched out and the butterfly was made from an Anna Griffin punch.

Saturday, February 27, 2010

Stamp of Approval

Here is an example of a stamped collage card.  The rose collage stamp (Rose Print) is from Stampington and the "screen" stamp is from Magenta.  Three square brads have been added as a final touch. 
On the inside I repeated the screen motif and the colored stripes.  The sentiment (Time to Enjoy) is from Hero Arts.

Friday, February 26, 2010

Poke Poke Poke

This technique is quite easy but the results can be spectacular!  It is called "Paper Pricking" or "Ornare".  The template or pattern can be printed on paper.  You can also purchase metal or plastic templates that make the job so easy.
Some directions say the smooth side is the front but I like to use which ever side appeals to me.  On this card I used the rough side as the outside.  I used a metal template by Marianne Design to prick the design.  I originally was going to do a "white on white" card but I decided it needed the silver cardstock to set off the design.  I added the silver ribbon for the finishing touch.

Here are some tutorials to help you on your way...

Here are some free patterns...

Thursday, February 25, 2010

Deer in the Light

Moonlight, that is...  I found this pattern on Craft Creations in Magazine 51.  I had some wood grain paper that I decided to use for the base card and some white vellum that had spots on it that reminded me of clouds.
 
I shone a flashlight through the vellum from the back to similulate moonlight. 

Here is some more information on silhouettes...

Wednesday, February 24, 2010

Falling, Falling

A "waterfall" card is so cool.  When you pull on the ribbon the small cards literally cascade over each other forming the waterfall.
 
Each of the cards has a different butterfly.  The green has a pin pricked design around the edges.  The bar is held on by two brads.
This is what it looks like when you "open" the card.  A message is placed on the hidden flap and appears as you pull the ribbon.

Here are some tutorials to get you started...

For reverse waterfall try these...

Tuesday, February 23, 2010

You On My Mind

I stitched this special paper embroidery card for my good friend.  The pattern can be found at Stitching Cards.
 
I stitched the patten of the front of the card and lined the inside front with a piece of white paper.  My last step was to use Martha Stewart's "Doily Lace Edge" punch on the opening edge of the card.

Monday, February 22, 2010

Circular Decor

This is a simple card made with a great Cuttlebug embossing folder of a Christmas Wreath.  Since it had poinsettia flowers on the wreath I decided to add a 3D layered poinsettia as I had done with yesterday's post.
 
 I decided to use white paper for the wreath to contrast with the poinsettia and the red cardstock.  Lastly I added a bow to top everything off.
 

Sunday, February 21, 2010

Spring Has Sprung

"Spring Card" that is...  My card group (Just Cards) had a swap last December and one of the choices was a "spring card" (a pop-up card of sorts).  Since it was nearing Christmas I used the poinsettia as my theme.
 
I used red cardstock for the base.  The greeting was printed out from Microsoft Word and the flourishes were stamped in gold.  The poinsettia's were from a 3D sheet that I cut out and layered.

After making the first card I decided to try a couple more versions.  This time I used Cuttlebug's "Swiss Dots" embossing folder on the greeting.  One was made on red and one on green cardstock. 
 

Here are some tutorials for you...

Saturday, February 20, 2010

Mo La La La

I borrowed a book called Traditional Card Techniques by Marie Browning from the local library not too long ago.  There was a section on African masks that inspired my next card.
 
I made this using a technique called "Mola" which in sewing (the original use of the Mola design) is an intricate reverse applique style.  In paper craft the Mola design is achieved by cutting out the outline of the original object (the blue section above).  Then the next color is attached to the back of the original and the design cutouts are made by cutting a small margin of the second color (yellow).  This continues as long as you wish.

The finished mola was attached to the card base to which I had already attached a piece of packing paper that I had saved (because it was cool).  Then I tied some red yarn around the fold of the card and attached three of my cockatiel's feathers.
On the inside I took a picture of African baskets, lightened it and added words using Microsoft Word.


Here is some additional information on the Mola technique...
...PDF